Pixel Painting Step by Step
|
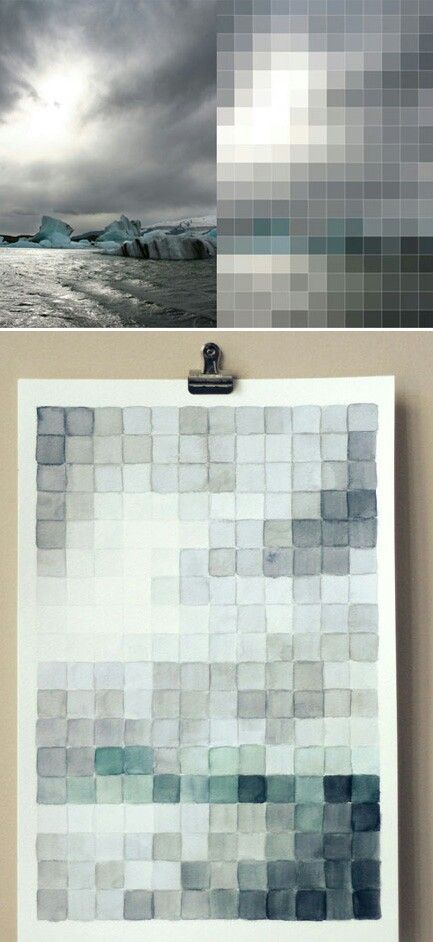
1. Find and research a painting by a historical artist within the dates 1500-1940. For the research portion of this project reference the short essay handout. Everyone must have a different painting, so you may want to choose a few backups. Use these sites to find your artist: www.artcyclopedia.com/ http://www.artinthepicture.com/ www.wga.hu http://www.google.com/culturalinstitute/project/art-project 2. When you have found an image, open it into Photoshop (if you are using your Chromebook then use the website PIXLR to edit). You may have to experiment with multiple images to find one that is interesting simplified into pixels. a. To pixelate the image click Image in the menu bar across the top. b. Then click on Image Size. Change the resolution to 72 and the pixel dimensions to 10 on the smallest side. It will become very small on your screen! c. To zoom, click View in the menu bar. d. Then click Fit on screen. e. Play with the adjustments, levels or hue/saturation to get the best color for your image. These can be found by clicking Layer> New Adjustment Layer. f. To print your image click File, Print. When the print menu pops up your image will be very small. Check the box that says Scale to fit media. This will make your image the size of the page. Be sure that you are printing to the 1610 COLOR PRINTER! 3. To begin your painting, you must make a grid on your paper. Using a ruler create 1”x1” boxes. You should have the same number of boxes on your paper as your pixelated image. 4. By mixing water colors you will begin to fill in the squares being careful to match the hues in each box to your image. Do not just use the color straight from the palette! You must mix each color before you paint. 5. Once you have started painting, you want paint every other box so that the boxes of wet watercolors do not bleed into one another. When those dry go back in and paint the ones you skipped. |
|
